This post is an answer from Stack Overflow and introduce some methods to create a window with blurring background.
This post is written in multiple languages. Please select yours:
Options to blurring background
We have three ways to blurring background on Windows 10 and each has its advantages and disadvantages.
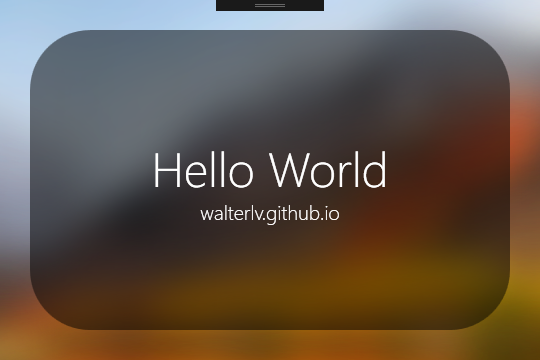
Call the Windows internal API
SetWindowCompositionAttribute. You can get a lightly blurred transparent Window but this transparency is much less than the iOS one.
![The image from my post]()
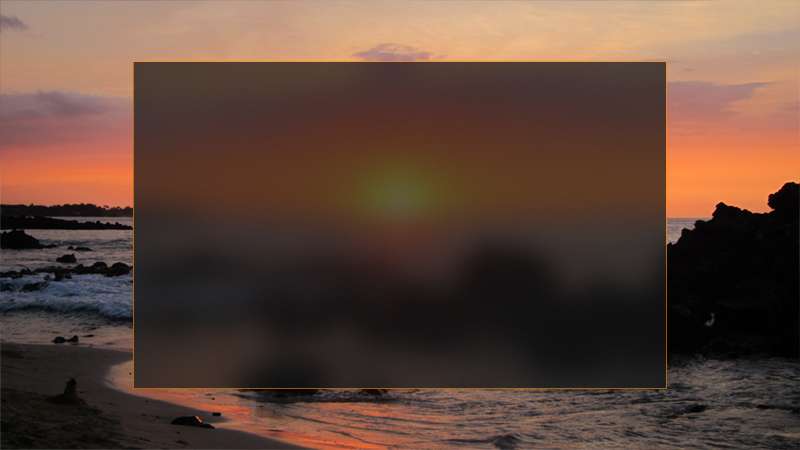
Add a
BlurEffectto the window background image. You can get a more similar visual effect like the iOS one with very poor performance. But in this way, the background image is fixed and cannot be updated when the window moves.
![BlurEffect of WPF]()
Use UWP instead of WPF and use the
AcrylicBrush. You can get a high-performance blur transparent window. But you should try the UWP Application development.
![The UWP AcrylicBrush from docs.microsoft.com]()

SetWindowCompositionAttribute API
Calling SetWindowCompositionAttribute API is not very easy, so I’ve written a wrapper class for easier usage. You can use my class by writing only a simple line in the XAML file or in the cs file.
1
2
3
4
5
6
7
8
<Window x:Class="Walterlv.Demo.MainWindow"
    xmlns="http://schemas.microsoft.com/winfx/2006/xaml/presentation"
    xmlns:x="http://schemas.microsoft.com/winfx/2006/xaml"
    xmlns:interop="clr-namespace:Walterlv.Demo.Interop"
    mc:Ignorable="d" Title="MainWindow" Height="350" Width="525"
    interop:WindowBlur.IsEnabled="True"
    Background="Transparent">
</Window>
Or you can use it in the cs file like this:
1
2
3
4
5
6
7
8
public class MainWindow : Window
{
    public MainWindow()
    {
        InitializeComponent();
        WindowBlur.SetIsEnabled(this, true);
    }
}
Just add my wrapper class into your project. It’s a very long class so I pasted into GitHub: https://gist.github.com/walterlv/752669f389978440d344941a5fcd5b00.
I also write a post for its usage, but it’s not in English: https://walterlv.github.io/post/win10/2017/10/02/wpf-transparent-blur-in-windows-10.html
WPF BlurEffect
Just set the Effect property of a WPF UIElement.
1
2
3
4
5
6
7
8
9
10
11
12
13
14
15
16
17
18
19
20
21
22
<Window x:Class="MejirdrituTeWarqoudear.MainWindow"
        xmlns="http://schemas.microsoft.com/winfx/2006/xaml/presentation"
        xmlns:x="http://schemas.microsoft.com/winfx/2006/xaml"
        AllowsTransparency="True" WindowStyle="None"
        Width="540" Height="360">
    <Grid>
        <Image Source="YourImageFile.jpg" Stretch="Fill" Margin="-60">
            <Image.Effect>
                <BlurEffect KernelType="Gaussian" Radius="60" />
            </Image.Effect>
        </Image>
        <Border CornerRadius="60" Margin="30" Background="#7F000000">
            <TextBlock Foreground="White"
                       FontSize="20" FontWeight="Light" TextAlignment="Center"
                       HorizontalAlignment="Center" VerticalAlignment="Center">
                <Run Text="Hello World" FontSize="48"/>
                <LineBreak/>
                <Run Text="walterlv.github.io"/>
            </TextBlock>
        </Border>
    </Grid>
</Window>
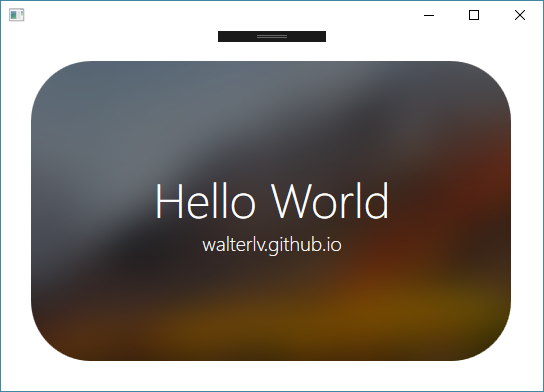
Notice that it has a very poor performance.
You can also add a RectangleGeometry to clip your UIElement into a rounded rectangle.
1
2
3
4
5
6
7
8
9
10
11
12
13
14
15
16
17
18
19
20
21
22
23
24
<Window x:Class="MejirdrituTeWarqoudear.MainWindow"
        xmlns="http://schemas.microsoft.com/winfx/2006/xaml/presentation"
        xmlns:x="http://schemas.microsoft.com/winfx/2006/xaml"
        Width="540" Height="360">
    <Grid>
        <Grid.Clip>
            <RectangleGeometry RadiusX="60" RadiusY="60" Rect="30 30 480 300" />
        </Grid.Clip>
        <Image Source="High+Sierra.jpg" Stretch="Fill" Margin="-60">
            <Image.Effect>
                <BlurEffect KernelType="Gaussian" Radius="60" />
            </Image.Effect>
        </Image>
        <Border Background="#7F000000">
            <TextBlock Foreground="White"
                        FontSize="20" FontWeight="Light" TextAlignment="Center"
                        HorizontalAlignment="Center" VerticalAlignment="Center">
                <Run Text="Hello World" FontSize="48"/>
                <LineBreak/>
                <Run Text="walterlv.github.io"/>
            </TextBlock>
        </Border>
    </Grid>
</Window>
UWP AcyclicBrush
You can read Microsoft’s documents Acrylic material - UWP app developer - Microsoft Docs for more details about how to write an AcylicBrush.
本文会经常更新,请阅读原文: https://blog.walterlv.com/post/create-blur-background-window-en.html ,以避免陈旧错误知识的误导,同时有更好的阅读体验。

本作品采用 知识共享署名-非商业性使用-相同方式共享 4.0 国际许可协议 进行许可。欢迎转载、使用、重新发布,但务必保留文章署名 吕毅 (包含链接: https://blog.walterlv.com ),不得用于商业目的,基于本文修改后的作品务必以相同的许可发布。如有任何疑问,请 与我联系 ([email protected]) 。